About / Greasemonkey Port for SeaMonkey
Greasemonkey Port is a userscript manager for SeaMonkey, originally written by Aaron Boodman and currently SeaMonkey front-end maintained by Marti, Ratty and/or Farby with some backend support from Anthony Lieuallen and Johan Sundström. It is the first extension to allow userscripts to be run in a web browser and is a near parallel branch of Greasemonkey 3.x itself. Originally Greasemonkey contained SeaMonkey support and is now split off.
Installing Greasemonkey Port
To get userscripts going in Greasemonkey Port, first you have to install it from the SourceForge Project website. This will show you the latest Greasemonkey Port version typically available for the latest version of SeaMonkey. Additional historical packages are available under Files.

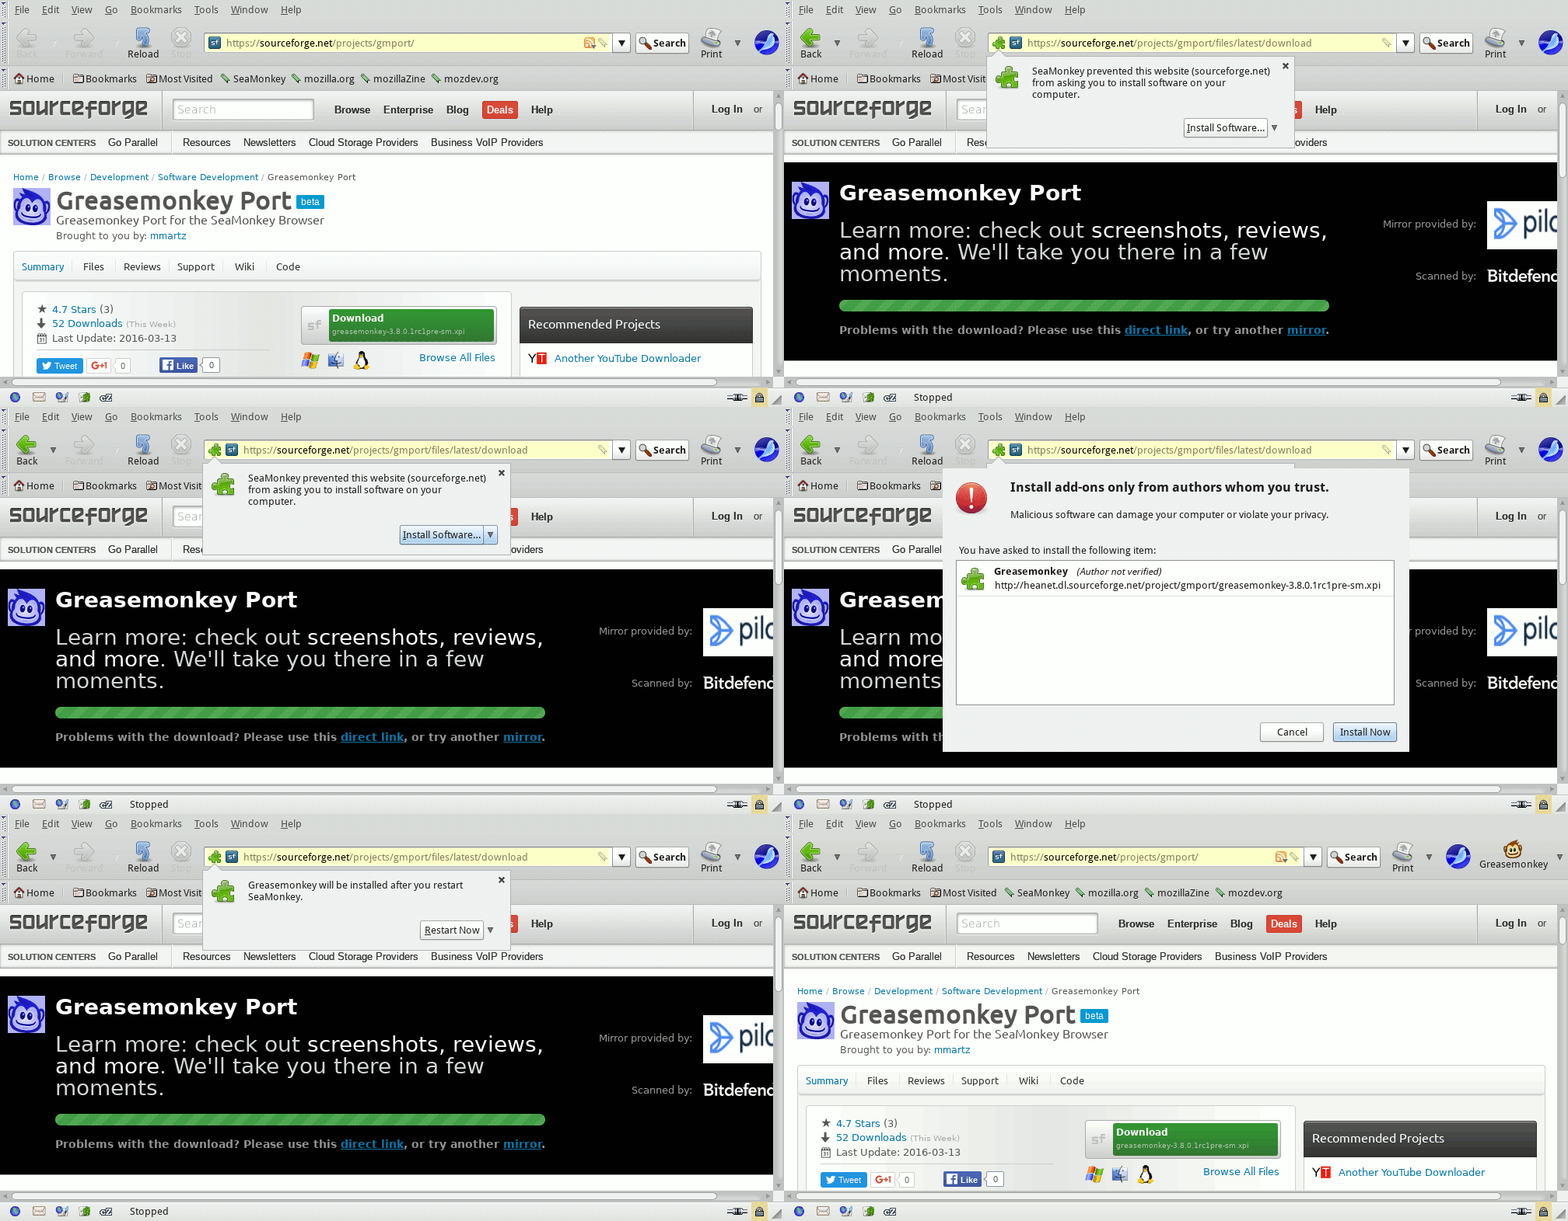
From the Greasemonkey Port page on SF, click the green "sf Download" button to install the extension. After a brief redirect to an appropriate mirror with a wait timeout, SeaMonkey will show a warning and ask you to confirm the extension. Click "Install Software..." then "Install Now".
SeaMonkey will prompt you to restart to complete the installation. You can either restart straight away, or finish what you were doing, close all SeaMonkey windows, then start the browser up again. When SeaMonkey restarts, you may see it do a compatibility check on your add-ons. Once it has finished, you should see Greasemonkey Port's monkey icon at the top of the window, near the SeaMonkey icon.
Installing Userscripts
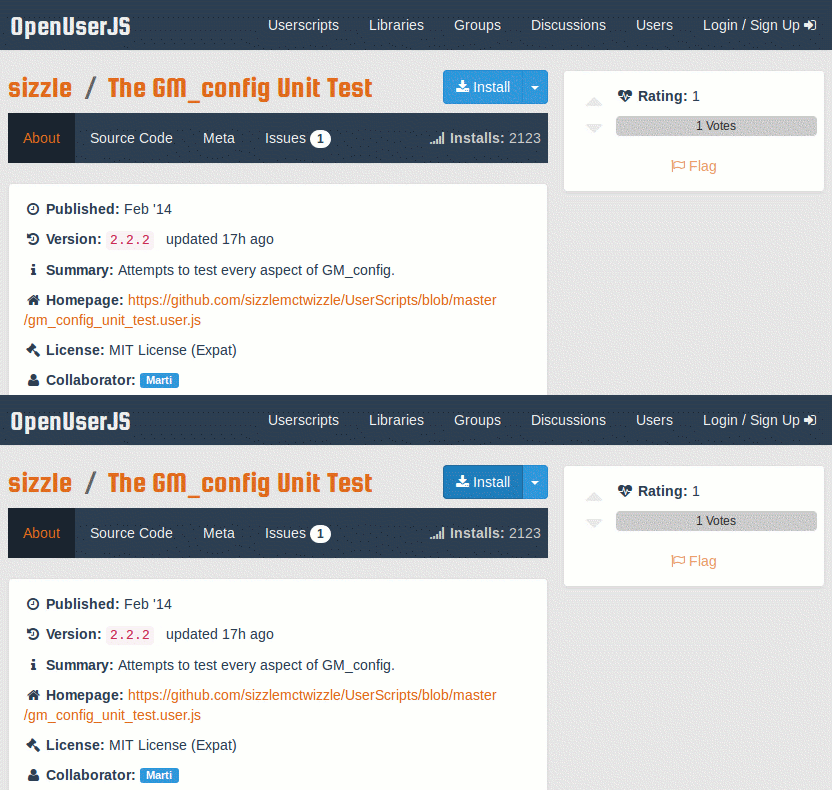
Once Greasemonkey Port is installed, installing userscripts from OpenUserJS.org is simple. Navigate to the OpenUserJS page for the script, then click the blue "Install" button at the top of the page.

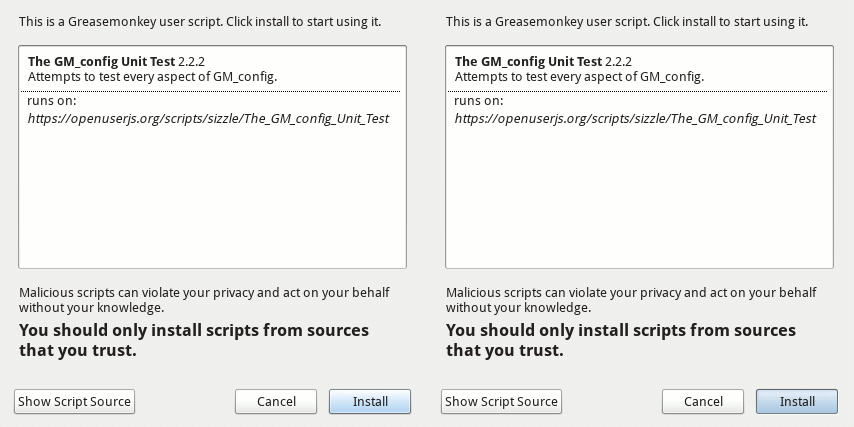
A confirmation dialog box should pop up, showing you details about the script and the websites it can access. Click "Install" if you want to go ahead, and you should get a confirmation that the script has been installed.

Sometimes, Greasemonkey Port shows you the source code of the userscript, rather than popping up the installation dialog straight away. At the top, there should be a prompt asking you whether to install it. Click "Install script", and you should get the installation dialog as normal.
Installing userscripts from other sources is a similar process. You just need to find the installation link for the script. This will be a button or link to a file with a name that ends ".user.js"
After installing a userscript, you won't normally notice any further changes until you visit, or refresh, a website that it runs on.
Managing Userscripts
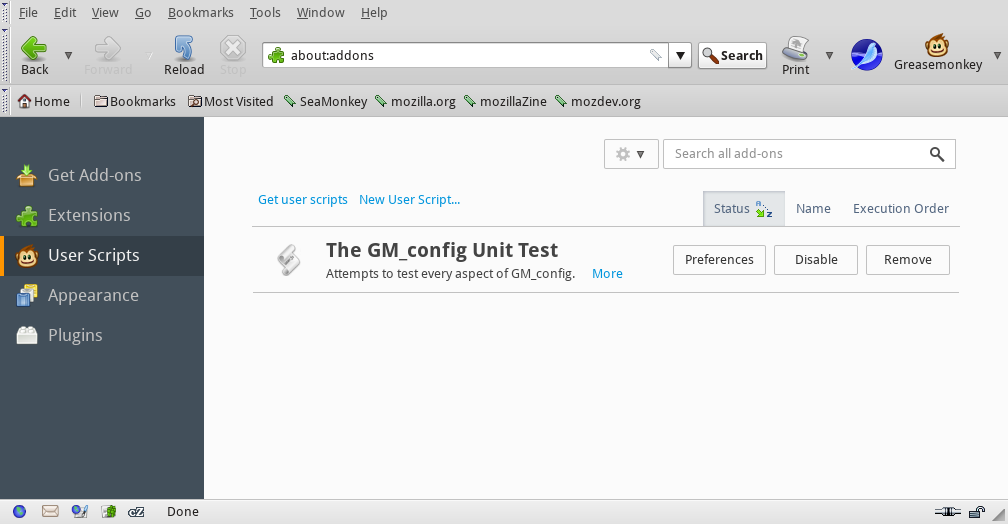
If you click the arrow to the right of Greasemonkey Port's monkey icon, there is an option to "Manage User Scripts..." This will take you to a User Scripts page in SeaMonkey's Add-ons Manager, which you can also find at about:addons. Buttons here let you enable, disable or remove each installed script. Clicking the gear icon above the list will let you check for updates (by default, Greasemonkey Port also does daily automatic checks via the browser initiated update interval).

Trouble shooting
If you think a userscript is causing problems, the easiest way to check is to switch off Greasemonkey Port, reload the web page, and see if the symptoms go away. You can turn it on or off by clicking the monkey icon, which should turn grey when disabled. A common problem is doing this by accident!
If it looks like you have a script problem and you have more than one script running on a web page, you can disable all of them in the Add-ons Manager, then re-enable them one by one, until you find the culprit. Remember to reload the web page each time - userscripts normally only run when a web page loads.
Sometimes, when you use more than one userscript on the same web page, they need to run in a particular order. You can also use the Add-ons Manager to achieve this. Click "Execution Order" above the list of scripts to see what order they will run in, then right-click on the individual scripts to make them execute first, last, sooner or later.
More
- Get Greasemonkey Port from SourceForge
- SourceForge Greasemonkey/Port Wiki
- OpenUserJS.org Greasemonkey Port Update Announcements
- Greasespot.net - blog, documentation and discussion about Greasemonkey.
- Ace Stream Web Extension for Chrome
- Ace Stream Web Extension for Firefox
- Android
- Chrome
- Chromium
- Digital Millenium Copyright Act
- Edge
- Falkon
- Firefox
- Frequently Asked Questions
- Greasemonkey for Firefox
- Greasemonkey Port for SeaMonkey
- iOS
- Linux
- macOS
- Opera
- Pale Moon
- Privacy Policy
- Safari
- SeaMonkey
- Tampermonkey for Android
- Tampermonkey for Chrome
- Tampermonkey for Chromium
- Tampermonkey for Edge
- Tampermonkey for Firefox
- Tampermonkey for Opera
- Tampermonkey for Safari
- Terms of Service
- Userscript Beginners HOWTO
- Violentmonkey for Chrome
- Violentmonkey for Chromium
- Violentmonkey for Firefox
- Violentmonkey for Opera
- Windows
- Yandex Browser
